| |
Mercury KF-9 Tune-Up Page 2
If you came in on this page, page 1 is HERE
(click on images for full-size pictures)
With the success of the 10HP Lightning KE-7, Mercury engineers set upon a project to create a new motor to revolutionize big outboards. This market was still dominated by the leftover WW II OMC quads and opposed twins, designed in the late 20's and early 30's. A number of designs were tried, opposed 4's, V-4's, square fours, and big twins, but the final design settled on was the alternate firing inline 4. This engine was introduced in 1949 as the model KF-9 THUNDERBOLT. These motors were not real popular in the first few production years as they were expensive and had no rewind or gearshift, these big "25" HP motors are scarce to rare and are very popular with collectors.
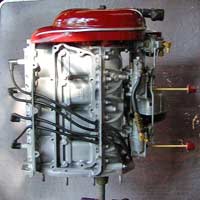 |
Continuing to add parts to the powerhead. The choke rod was broken off through the top choke lever, so I was able to use the choke rod from a later model 4 cylinder by straightening it out and threading the end. The original high speed knobs on these were red anodized, this had faded over the years. In order to regain the original appearance I used a translucent fingernail polish on them. This worked great, the metal shows through, looks just like the anodize would. |
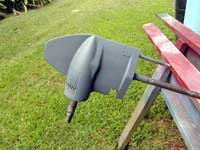
| Next we took a look at the bottom half of this motor. Other than some rust on the external portion of the propshaft where the brass prop fit on and a little corrosion on the driveshaft, all of this portion of the motor was nearly new. There is no wear on the saddle where the engine sits on the tilt pin, and the splines on the driveshaft aren't even polished where they engage the crank. An interesting note - the water tube has a Y just below the exhaust relief nipple and a second line enters the lower unit in front of the drive shaft. But, this hole dead ends in the gearcase and does not connect to the water pump. I have no clue what the function of this was supposed to be. A few flaws in the housing were faired in and the case was primed and sanded to smooth it out. |
 |
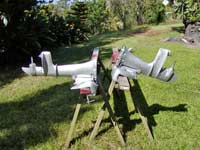 |
Finding any dull aluminum lacquer or enamel in Hawaii was an impossibility. I had a small amount of original lacquer left to use on the motor but it didn't stretch. The only close finish I could find there is Krylon "Rust Control" enamel in a spray can. I finished these off with this and lightly dusted some acrylic clear over the top to hopefully control this stuff running off or turning to goo if it gets oil or gas on it. The second tower in the picture is that of a KE-7 I am also working on. Another real nice low time classic I was fortunate to obtain. I had found a good dull aluminum lacquer here in Florida at LOWES. It's Valspar "American tradition" 165887 aluminum> says "FLAT" on the cap. Of course now Lowes has changed all the labels and this finish has vanished again! |
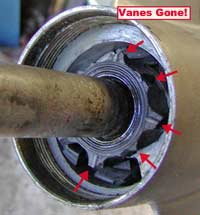
| I realized that I had forgotten to check the impeller. After a fight with the left hand threaded pump cover (right) this is what I found. |
 |
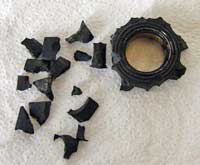 |
What you see here is generally what you will find in older motors. if the original impeller looks good, replace it anyhow as the old rubber will soon disintegrate, causing a toasty motor. This is what remained of the impeller after I cleaned it out of the housing. These little chunks and hunks like to migrate up water tubes and lodge in obscure places. Be sure if your working on an otherwise OK motor to account for all the pieces! |
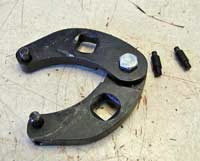
This little tool works to remove just about any size gearcase or trim cylinder cover, the center hinges so you can fit any span. With a breaker bar you can loosen even some of the tough ones. I had to resort to the old punch it method on this one however as after 53 years, cover wouldn't come out without getting brutal. This tool is available from Bombardier as 912084 but the current price is a breathtaking $234.64 as of January 2011 !!
Just senseless.... |
 |
Still a ways to go on this project, so go to PAGE 3. There we marry up both halves of the motor and have some pictures of the finished product.
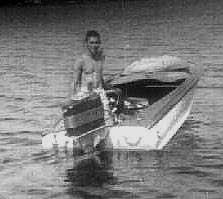 Here
is a shot of the kid around 1957 with a KF-9 on his 12' Thunderbay glass
runabout. I have 2 pictures of this, and a short old movie of my boat
taking off. These are the only pictures I have, but I have a lot more
in my head. Good times! Here
is a shot of the kid around 1957 with a KF-9 on his 12' Thunderbay glass
runabout. I have 2 pictures of this, and a short old movie of my boat
taking off. These are the only pictures I have, but I have a lot more
in my head. Good times!
My thanks to Charlie and Phil Williams at Performax Marine, Tom Moulder and Dave Losvar at Sea Way, and Bob Grubb at Grubbs' Marine for assistance with locating parts for this motor. |
|
|
| |
Please review our Warranty, Returns & Refunds policies before you place an order.
DISCLAIMER
The information provided on these pages is correct to the best of my knowledge, however the MasterTech makes no warranty, express or implied, regarding the use of, results of, or liability created from, application of this data. This information is disseminated in good faith, however MasterTech assumes NO LIABILITY whatsoever in regard to this service. The information, software, products, and services published on this web site may include inaccuracies or typographical errors. Changes are periodically added to the information herein. Mastertech may make improvements to this site at any time. Parts ordered from this website may or may not be in dealer stock at the time of order. Thank you for reading.
|
|

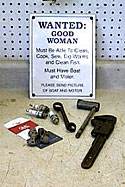
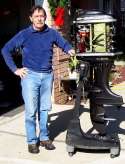


 Here
is a shot of the kid around 1957 with a KF-9 on his 12' Thunderbay glass
runabout. I have 2 pictures of this, and a short old movie of my boat
taking off. These are the only pictures I have, but I have a lot more
in my head. Good times!